|
Making Container Candles
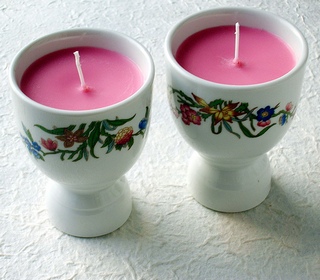
Making your own container candles is a great opportunity to create "two-for-one" gifts. Not only does your recipient get a lovely candle, but they also get something pretty and useful when the candle is long gone. Items such as:
Container candles are pretty straightforward and soy wax is particularly well-suited for making them. In addition, soy wax burns very clean and makes a very nice candle. You can also use gel wax, which is used for making see-through candles and embedded with objects like shells, beach glass, or pebbles. Not every fragrance oil is compatible with gel wax. Some fragrances will cause the wax to get cloudy while others will not bind properly in the wax, so you will need to take this into consideration when choosing your wax type. It is possible to use a paraffin wax to make container candles, but due to it's high melting point, you will achieve better results using a blend rather than pure paraffin (and reducing the risk of breaking your container while burning). What You'll Need Directions:
Using some kind of double boiler set-up, melt your wax. A good target temperature is 170-175° F. Once your wax has completely melted, add any additives you have selected and mix thoroughly. Straighten your pre-tabbed wicks out. Apply hot-glue to the base of the wick tab and press the tab to the center of your container. For deeper containers with smaller openings, you can use something like chopsticks to guide the tab into place.
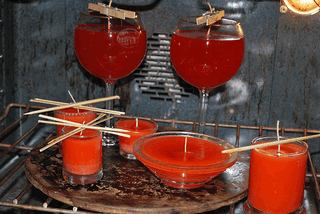
You will need to provide some sort of support to help keep the wick centered while the wax is cooling. For smaller containers you can use a clothespin to hold the wick in place, or, for larger openings, you can loop the wick around a wooden skewer. Place containers on a cookie sheet lined with foil or parchment paper for easy cleanup. Heat in the oven at 150° F for 10 minutes. This step is not absolutely essential, but it will provide a nicer finished product with less air bubbles. Fill your container to the desired level. If it is a container with a lid, remember to fill it only to a level that will leave enough room for the lid to properly fit back on the finished candle. Be sure to set aside some wax for step 6. Allow the wax to completely cool before proceeding. Slow cooling generally provides the best results when it comes to container candles. So, don't attempt to accelerate the cooling process. When your candle has cooled, you will see that it has sunk in the middle a bit. To cover that up, you will reheat the wax that was set aside in the previous step. Heat the wax to 185° F so that the wax will be hot enough to adhere to your candle and hide any seam lines. Pour the heated wax into the candle so that it barely covers the wax from the first pour. Allow to cool.
Once your candle has completely cooled, remove the wick support and trim the wick to ¼". Be sure to scrape off any stray wax drips. Container candles are the easiest candles to create, but they need not be ordinary. There are so many choices when it comes to types of containers in which you can present your homemade candles that your own imagination is the only thing holding you back. Candles make great gifts and one that you have made yourself is sure to impress.
|


